
トヨタ80系ヴォクシー・ノアのルームランプが暗いので交換したいという方は多いです。
 悩んでいる人
ヴォクシーのルームランプが暗いので明るくしたいな。
 悩んでいる人
ノアのルームランプの交換で失敗したくない。
本記事では、ルームランプを交換したいと考えている方向けに、LEDルームランプのおすすめ商品と交換方法を解説します。
 T部長
T部長本記事を読めば、商品の選び方から交換方法までわかります。
トヨタ80系ヴォクシー・ノアのDIYメンテナンスを考えている方は、
▶【ヴォクシーZRR80WにワコーズRECSをDIY施工する方法】も参考にしてください。
ルームランプを選ぶ時の種類
ルームランプの電球は大きく分けて白熱球とLEDの2種類があります。ルームランプの電球を交換する機会は少ないので、購入する際にどちらを選べばいいのか迷う方も多いのではないでしょうか。
こちらでは白熱球とLEDそれぞれのメリット・デメリットを解説します。どちらの電球を購入すればいいのか迷っている方は、参考にしてみてください。
白熱球
白熱球のメリットは、LEDよりも価格が安く、優しい色合いで照らしてくれます。
一方、白熱球のデメリットは、電線を加熱して発光しているため消費電力が高く、発熱しやすいので電球の寿命が短いです。また、手元を確認する程度であれば十分な明るさですが、車内全体を照らすには物足りないかもしれません。
LED
LEDのメリットは、消費電力が少なく、発熱量が少なく、寿命が長いことです。デメリットは、白熱球に比べると価格が高いことです。
LEDのルームランプは、以下の3種類があります。
- バルブタイプ(両口金タイプ、弾丸のような形、全ての電極が下向きに付いている)
- ウェッジタイプ(豆電球形の挿し込むタイプ、発光面が周囲に満遍なくついており下方向への明るさでは不利)
- 基盤タイプ(基盤に多数のLEDを搭載、広い面を照射可能、汎用タイプと車種専用タイプがある)
それぞれに特徴がありますが、明るさを求めるなら基盤タイプがおすすめです。
基盤に多数のLEDランプが搭載されており、とても明るく車内を照らしてくれます。
80系ヴォクシー・ノア専用LEDルームランプのおすすめ人気ランキング

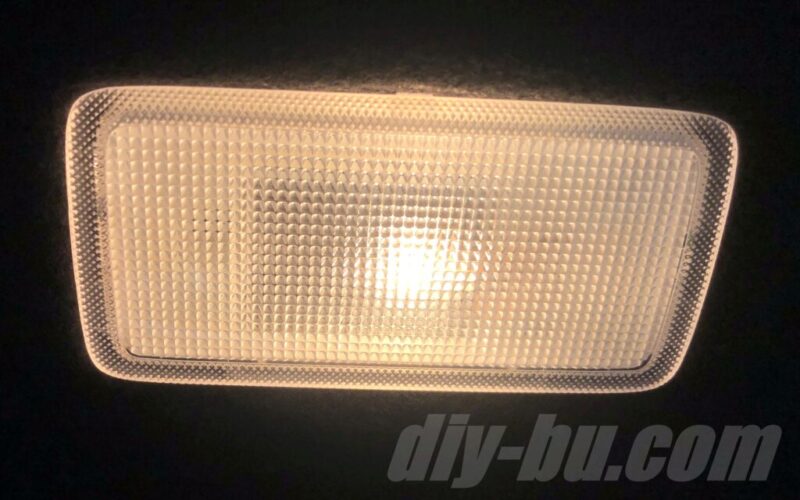
ルームランプを交換する際は、LEDに交換することをおすすめします。
なぜなら、LEDは白熱球よりも寿命が長く、消費電力が少ないうえ、より明るいからです。
車種専用のLEDルームランプを選べば、サイズや個数などがぴったりなので、取り付け可能かどうかで悩む必要はありません。
80系ヴォクシー・ノア専用ルームランプ(ホワイト色)を、Amazonのレビューの評価が100未満のものは除き、レビュー評価が高い順にランキングにしました。
さまざまなメーカーから多数販売されていることから、LEDルームランプはかなり需要の高いものとなっていることがわかります。
どうぞ商品選びの参考にしてください。
第1位 OPPLIGHT LEDルームランプ

3チップSMDを使用しているため、通常の1チップSMDの3倍の明るさを実現。
第2位 スフィアライト LEDルームランプ

【微点灯対策済】
LEDの微点灯(ゴースト現象)対策済み。
【高輝度LED採用】
1個あたり22ルーメンの高輝度LEDチップが心地よい明るさを実現。
【セット内容】
フロントランプ(38 チップ)×1
センターランプ(42 チップ)×1
リアランプ(42 チップ)×1
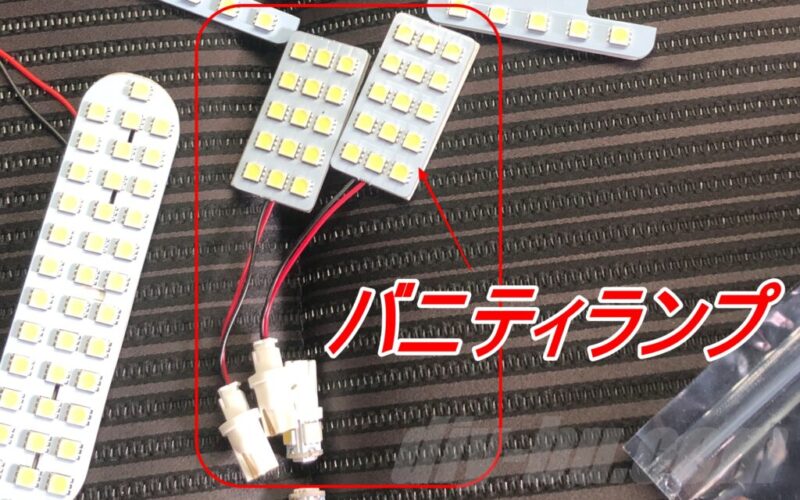
バニティランプ(15 チップ)× 2
第3位 YAOFAO LEDルームランプ

3チップSMDを使用しているため、通常の1チップSMDの3倍の明るさを実現。
第4位 TOPNIC LEDルームランプ

3チップSMDを使用しているため、通常の1チップSMDの3倍の明るさを実現。
第5位 2LOOP LEDルームランプ

フロント×1、セカンド×1、サード×1、バニティ×2、ナンバー灯×2の全7点セットです。6,000Kクラスの純白光で室内を明るくします。
第6位 AKI LEDルームランプ

第7位 Auto Ideas LEDルームランプ

【高輝度LEDチップ採用】:本製品は車の室内の明るさを求めるために、一つLEDの中に発光点が三つ搭載されている3チップSMDを採用していますので、驚きほどの明るさ、室内を明るく照らします。
【セット内容】フロントランプ×1、センターランプ×1、リアランプ×1、バニティランプ×2、ナンバー灯×2、取付道具1セット(4種類)
第8位 LTONXEN LEDルームランプ

【セット内容】フロント×1、センター ×1、リア ×1、バニティ ×2取付専用工具×1、取付専用工具×1
ルームランプの交換に使う道具
- 内張りはがし
- 薄手のゴム手袋
- マスキングテープ
内張りはがしはエーモンの定番商品を使いました。

また、薄手のゴム手袋があると火傷の防止になります。直前まで点灯していた電球は熱くなっていますので、素手で触ると危険です。LEDに手の脂がついて汚れないためにも、薄手のゴム手袋をしての作業をおすすめします。
そのほかには、マスキングテープをあらかじめ貼っておくと車内に傷を付けずに作業することができるので、あったほうが安心です。
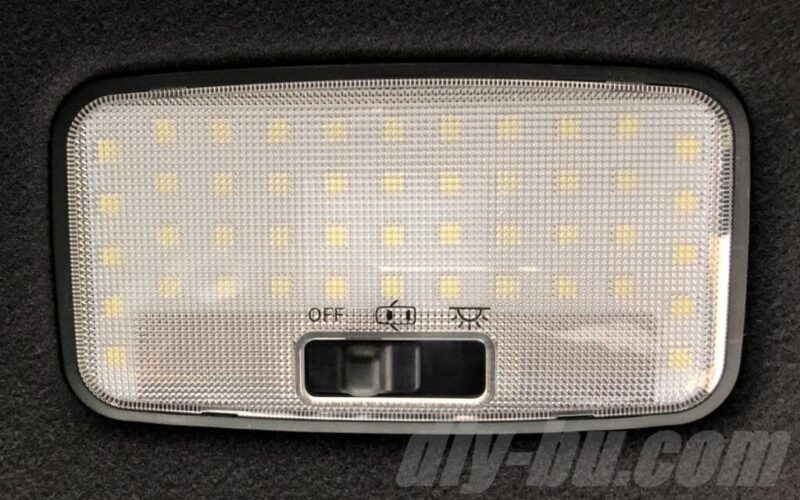
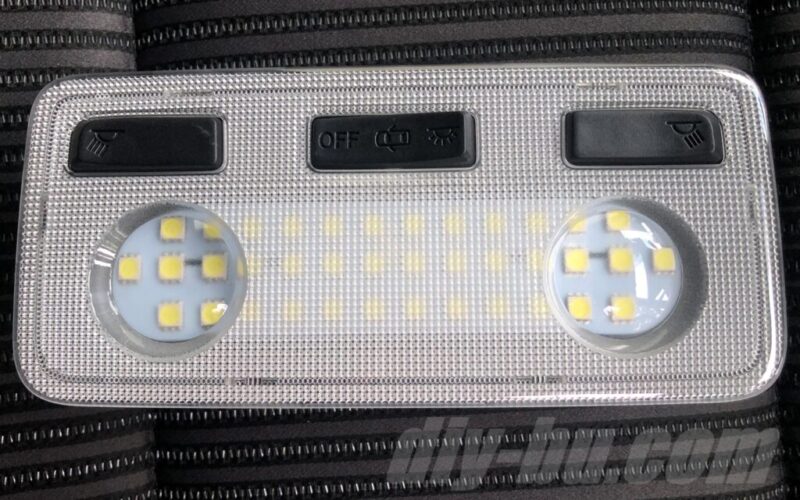
ルームランプの交換方法
本記事では、白熱球から基盤タイプのLEDに交換する方法を解説します。
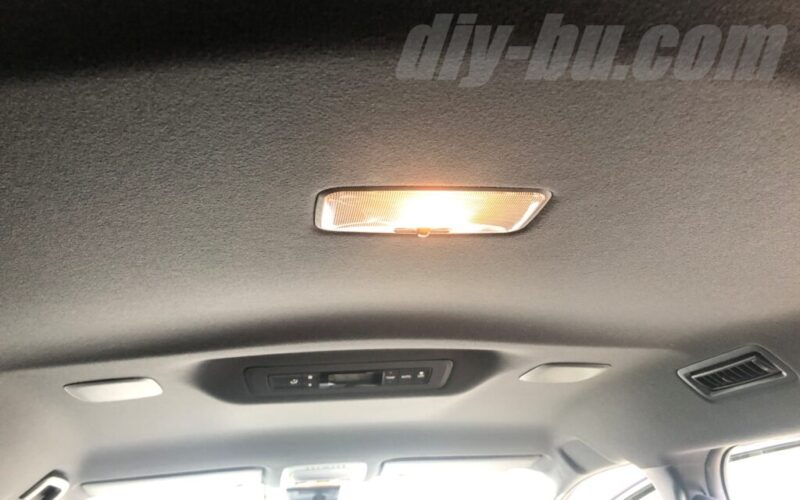
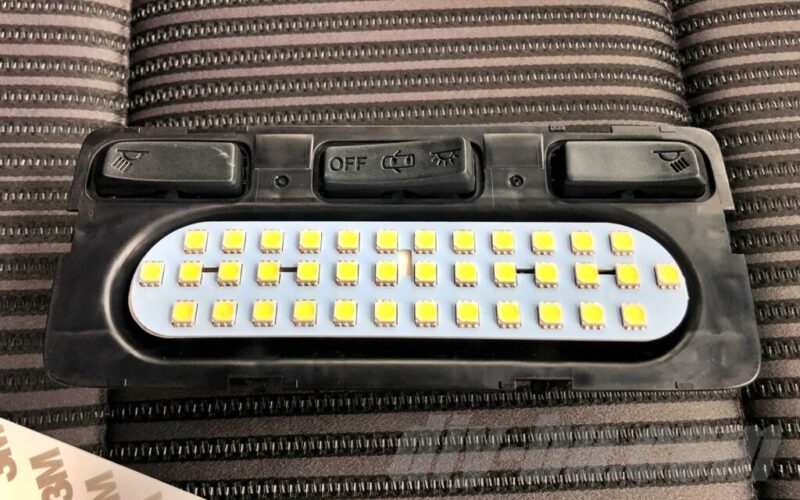
ラゲッジとセンターランプの交換方法
ラゲッジランプとセンターランプは同じ作りで取り外しも簡単なので、ここから始めるのがおすすめです。
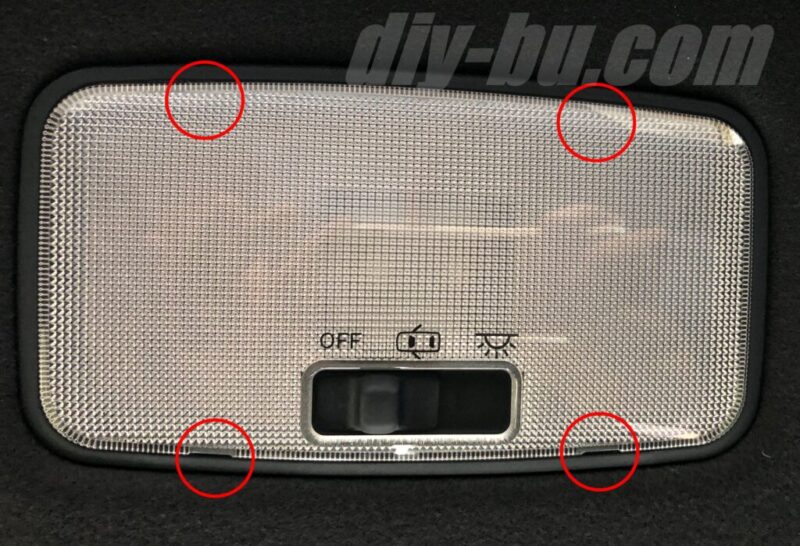
内張りはがしをカバーのツメ部分に差し込みます。
ツメは赤丸の位置に前後2か所ずつあります。前後いずれか片方の2か所を外すとスライドして取り外せます。
さほど力は必要ありません。
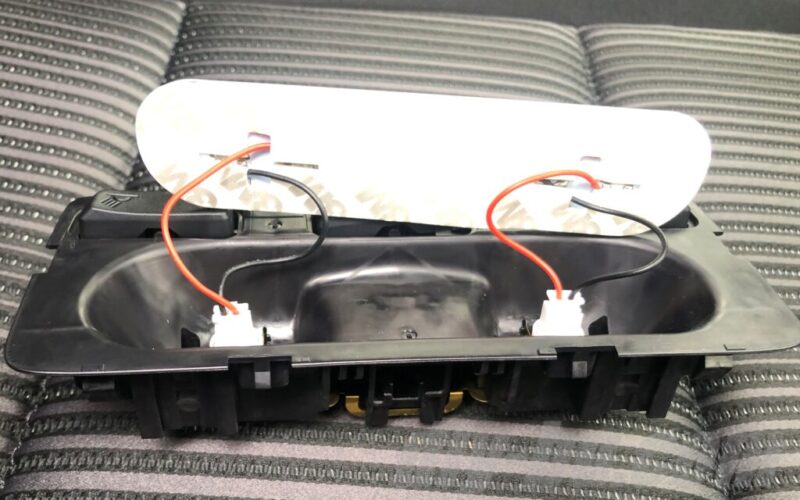
カバーを外した状態です。
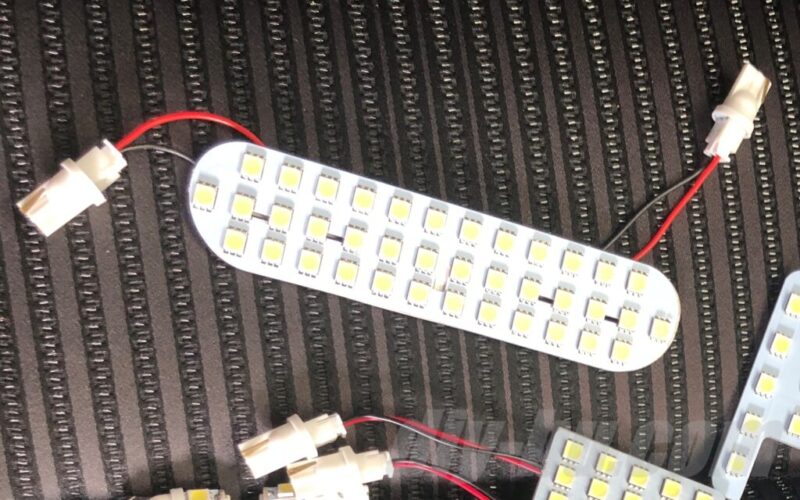
これが外したランプ。
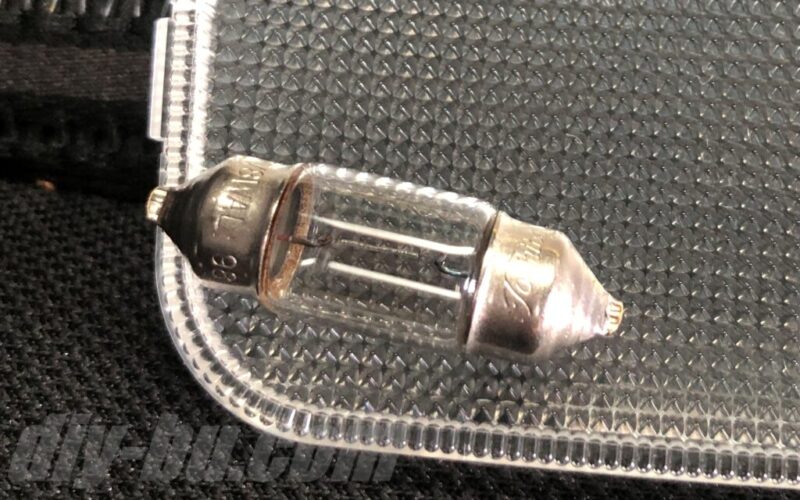
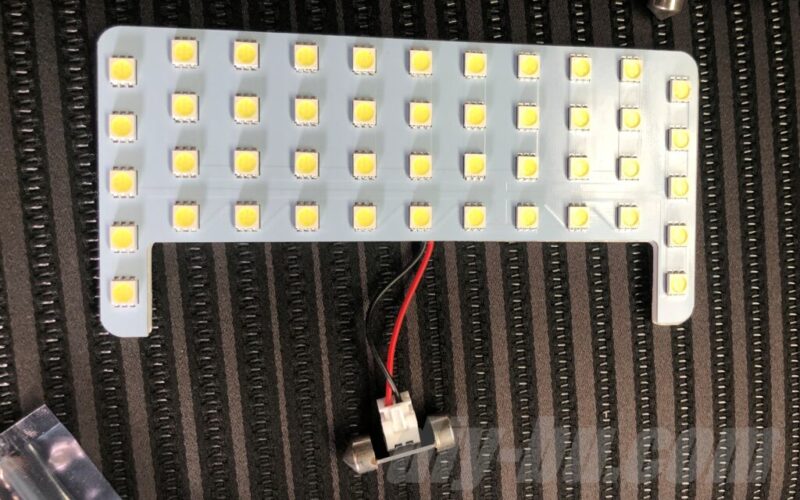
これから取り付けるランプ。LEDには極性があり、プラスマイナスを逆に挿すと点灯しません。
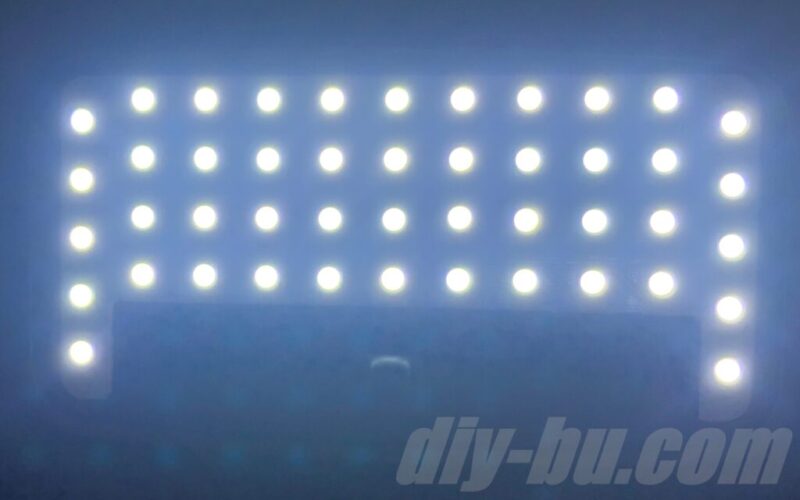
パネルの方に書いてあるわけではないので、取り付けて点灯確認します。
スイッチを下とすると、左がプラスでした。
取り付ける部分は、片方が板バネになっており、中央にスリットが開いています。そこにしっかりとはめます。
このバネ、あまり強くないためホールド力が弱いです。念のため、指で内側へ少し倒してばねのホールド力を上げておきます。
裏面の両面テープの保護シートを剥がしてラゲッジランプユニット本体にくっつけます。
カバーを元どおりに戻します。
センターランプも全く同じ作業を行い、交換します。
バニティランプの交換方法
サンバイザー裏の天井に付いているバニティランプも同じく暗いので、LEDに交換します。
まず、運転席側から交換します。
ちょっと外しにくいですが、内張りはがしを左から挿し込み、引き出します。

バニティランプを基盤ごとカバーのツメから取り外します。
貼るタイプのLEDのランプを使います。
カバーにLEDランプを取り付け、元の電球を取り外し、ソケットに挿し込みます。

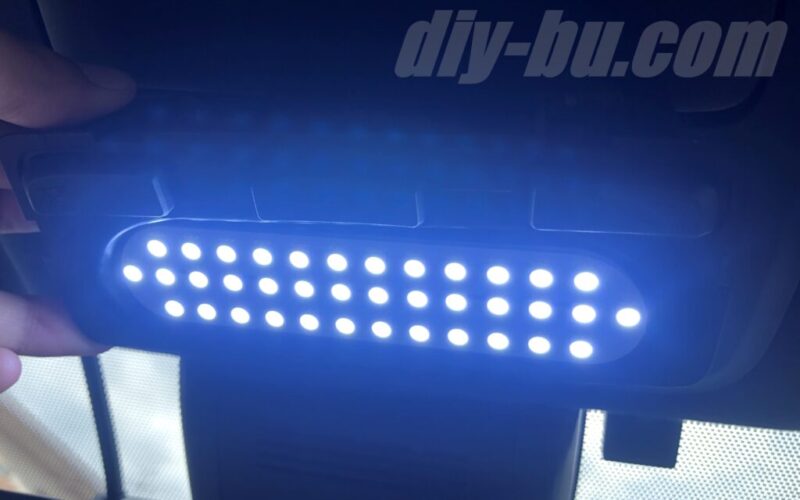
カバーを天井に戻す前に、点灯確認します。
基盤をカバーのツメにはめ込み、天井に戻したら完了です。
助手席側も全く同じ手順で、交換します。
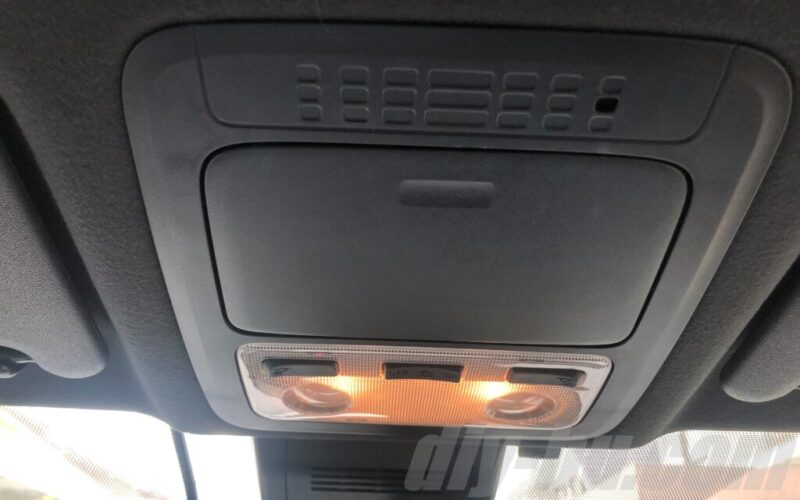
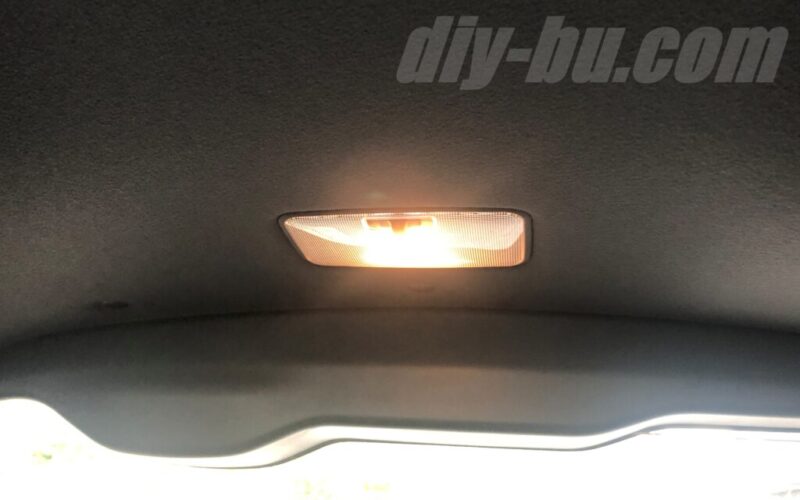
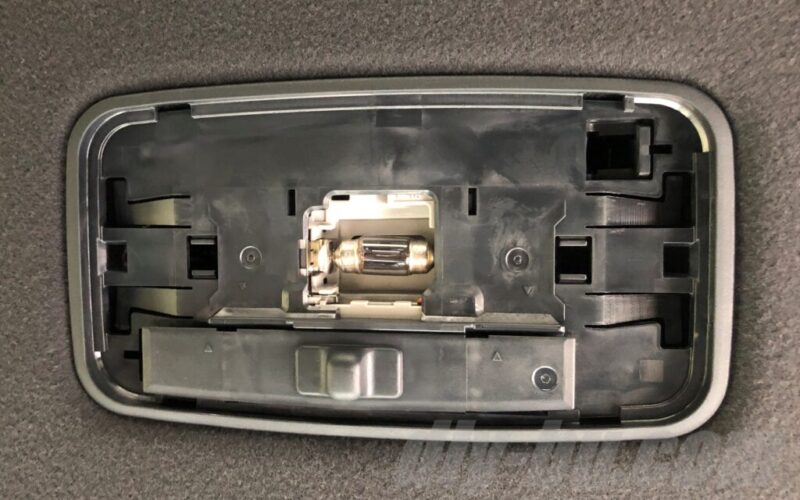
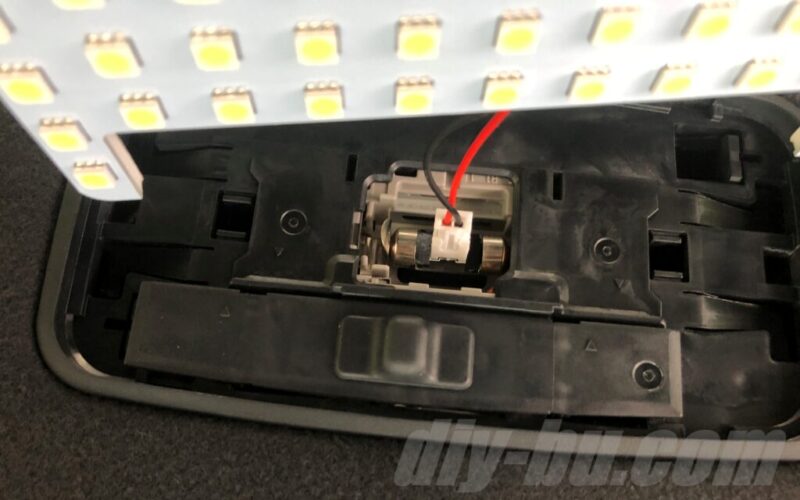
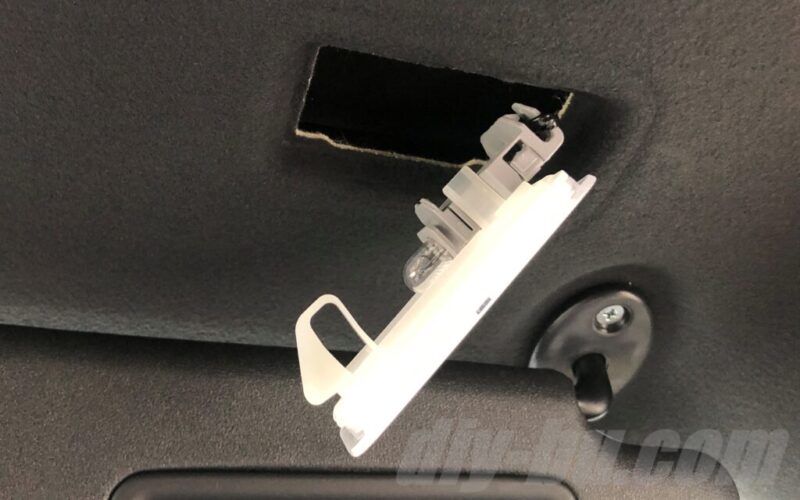
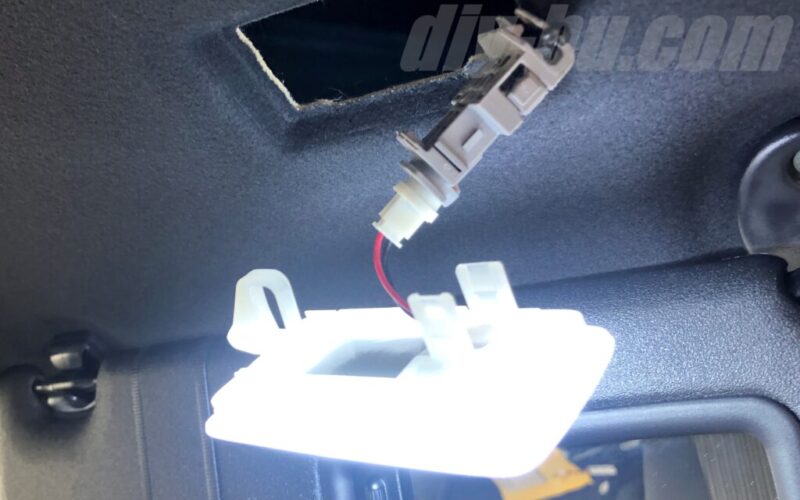
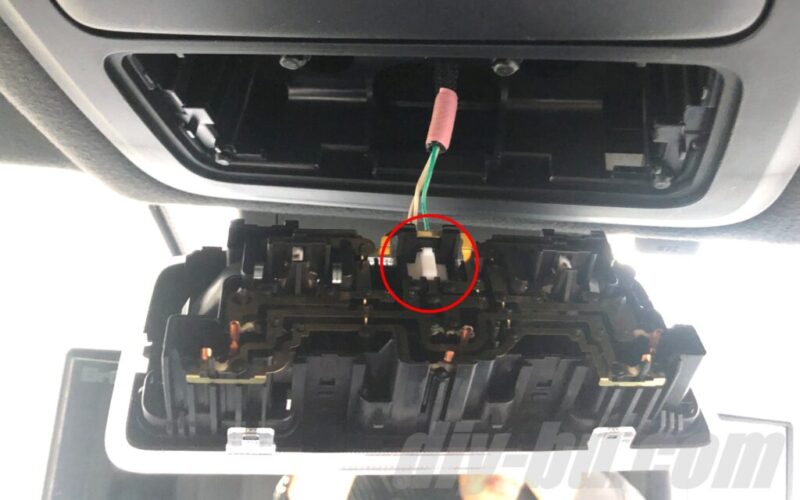
マップランプの交換方法
マップランプも暗いので交換します。
内張りはがしを使って、マップランプユニットごと取り外します。
ユニットをつないでいるケーブルが短く作業がしにくいため、赤丸のコネクターをツメを押して取り外します。
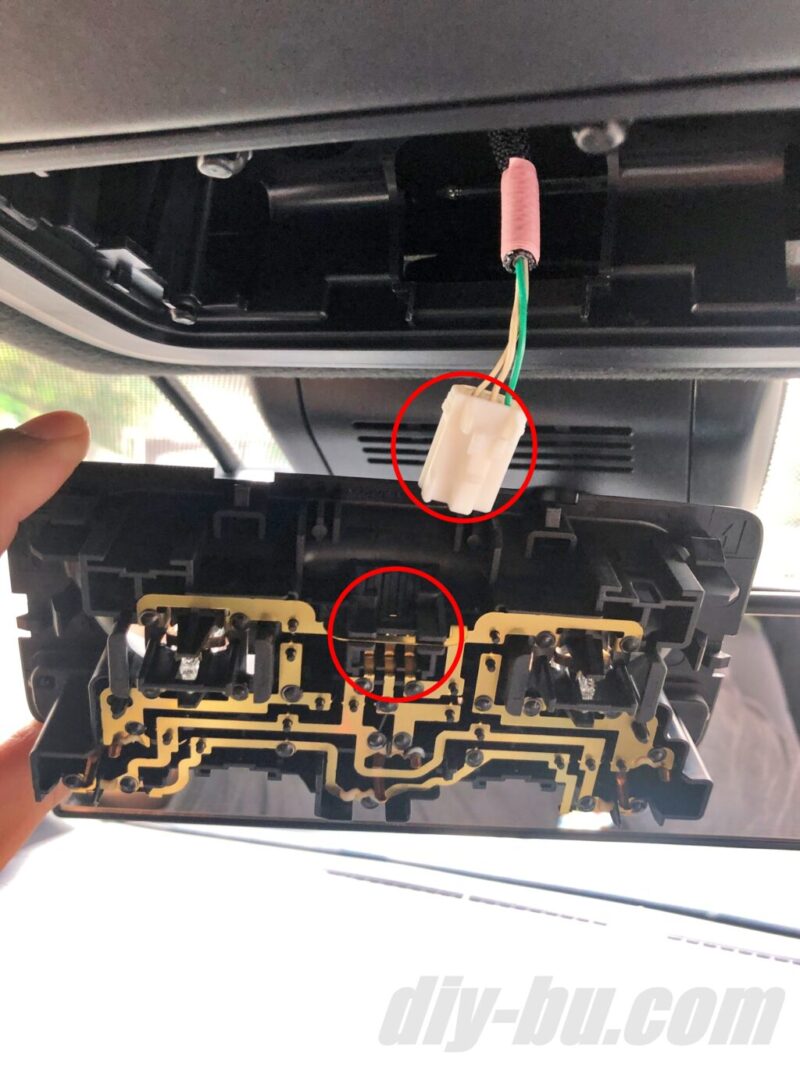
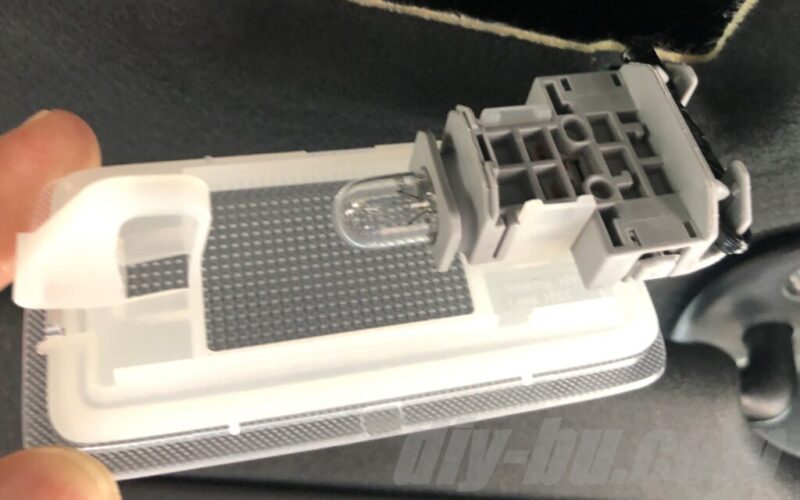
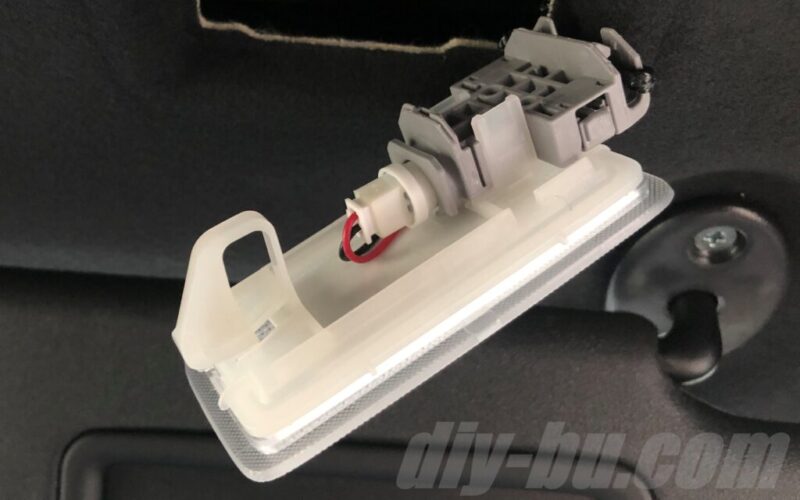
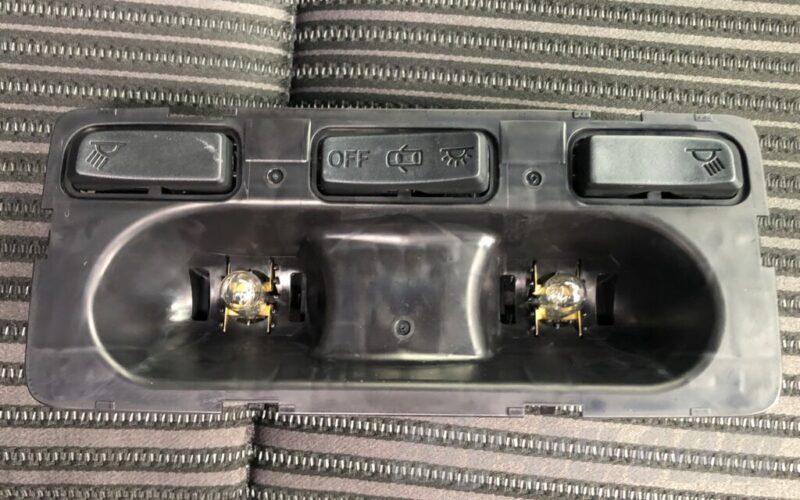
マップランプユニットからカバーを外します。カバーは6か所のツメで留まっています。
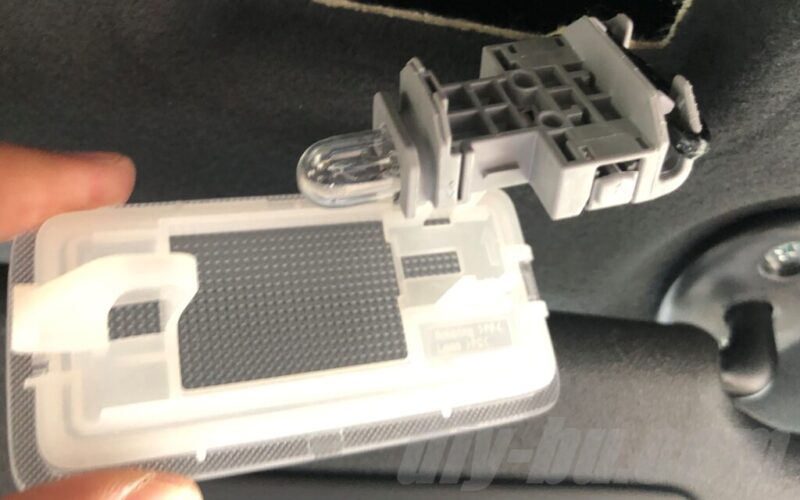
元の電球を取り外し、LEDのコネクターをソケットに挿し込みます。
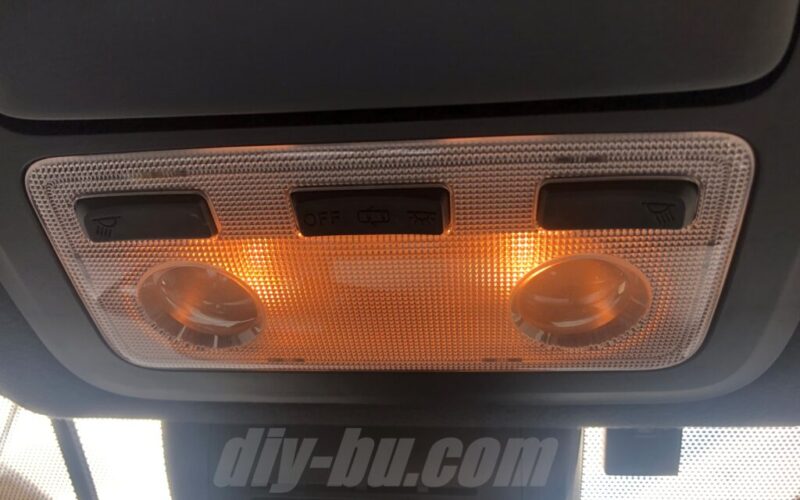
元に戻す前に、点灯確認します。
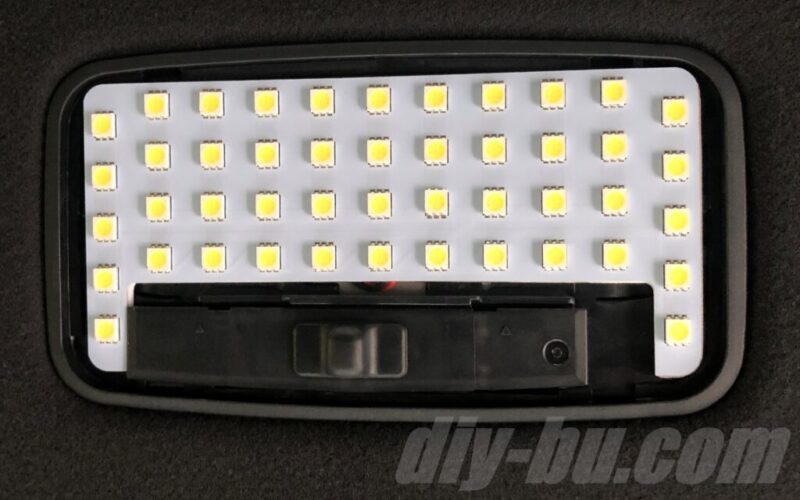
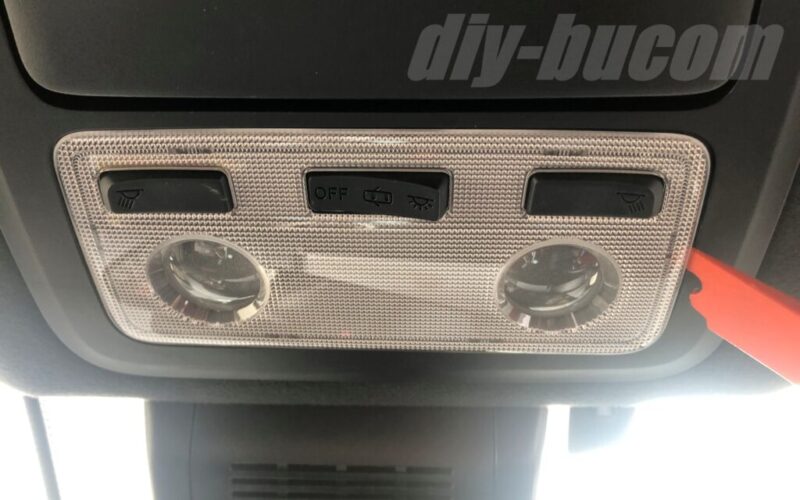
マップランプユニットにLEDを両面テープで貼り付けます。
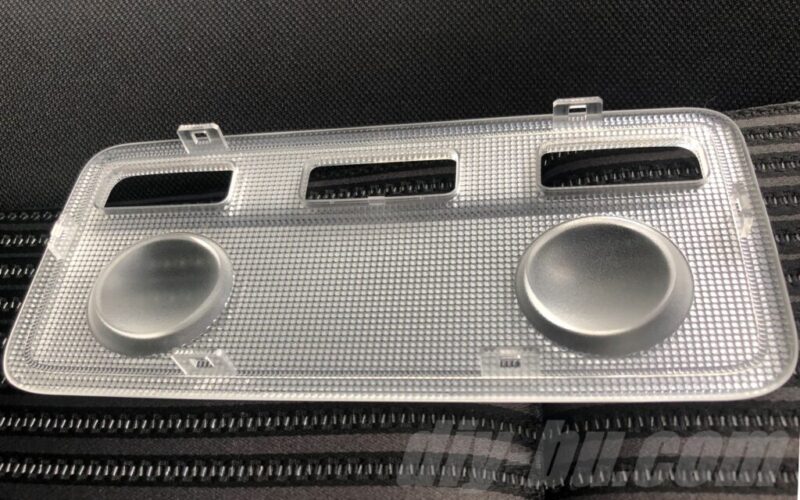
マップランプユニットにカバーを取り付けます。
天井の元の位置に戻して完了です。
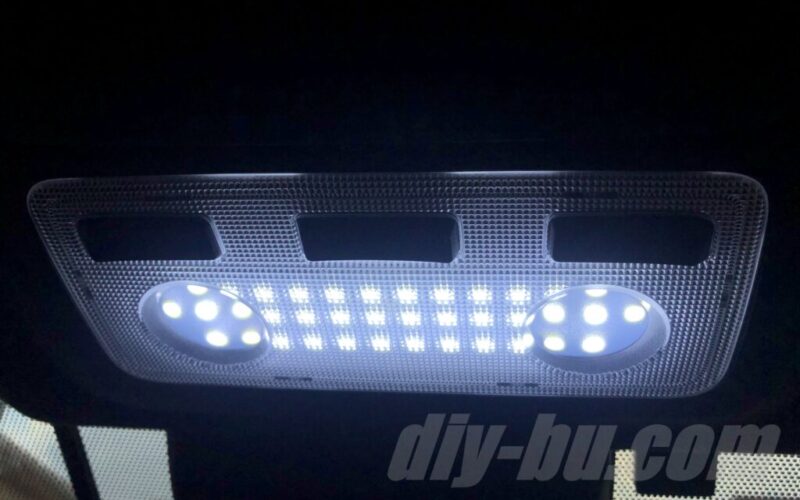
これでマップを見るのにもばっちりの明るさになりました。
まとめ
80系ヴォクシー・ノア専用の基盤タイプのLEDルームランプのおすすめのほか、レンズカバーの外し方やランプの交換方法までをまとめました。
ルームランプの交換は女性や年配の方でも簡単にできます。 恐れずにDIYでやってみましょう。 強い力でやらない限り、壊れたりはしません。
本記事がルームランプをDIYで交換するときの参考になれば幸いです。
それでは!